
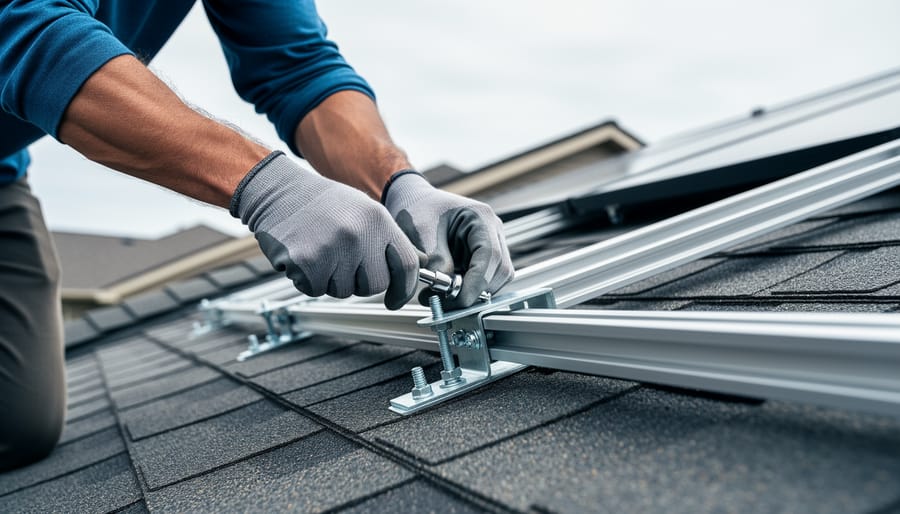
Installing solar panels yourself is feasible for homeowners with strong electrical and roofing skills, but most DIY projects should stop at panel mounting, leaving grid-connection and electrical work to licensed professionals. The typical DIY installation takes three to five weekends, costs 30 to 40 percent less than full professional installation, and requires adherence to strict electrical codes and permit requirements that vary significantly across Canadian provinces.
The solar DIY movement has gained momentum as panel prices have dropped and modular systems have become more accessible. However, the distinction between what you can legally do yourself and what requires certified expertise matters more in Canada than many online guides suggest. While innovations like offshore solar farms push utility-scale boundaries, residential DIY focuses on careful execution within local regulations rather than cutting-edge technology.
The financial case for DIY remains strong in 2026. A professionally installed 5-kilowatt system typically costs between $12,000 and $18,000 after provincial rebates, while handling the mounting and racking yourself can save $3,500 to $6,000. Yet these savings vanish if your installation fails inspection, creates roof leaks, or violates utility interconnection agreements.
This guide walks through what belongs in the DIY category, the tools and materials you’ll need, safety protocols that protect both you and your investment, and the step-by-step process for mounting panels correctly. Whether you’re aiming for full energy independence or simply want to reduce your environmental footprint while controlling costs, understanding the realistic scope of solar DIY work ensures your project succeeds the first time.
Understanding What DIY Solar Installation Entails
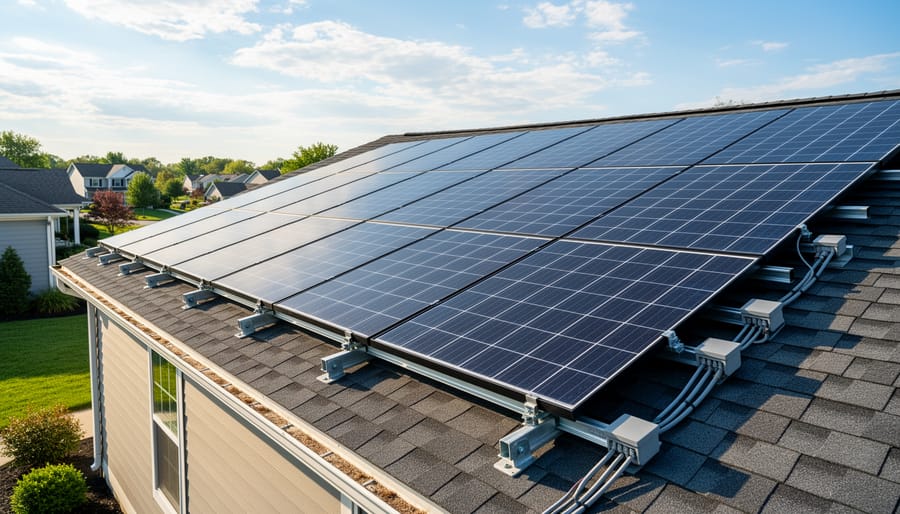
A typical residential solar DIY installation involves a series of distinct phases, each with different skill requirements and legal constraints. Most homeowners can handle the physical installation of mounting hardware and solar panels themselves, which includes assessing your site, securing equipment to your roof or ground mounts, and positioning the panels for optimal sun exposure. These mechanical tasks require basic construction skills, comfort working at heights, and attention to detail rather than specialized technical knowledge.
However, Canadian renewable policy and provincial electrical codes strictly regulate who can perform electrical work. In all provinces, connecting your solar system to your home’s electrical panel or the utility grid must be completed by a licensed electrician. This isn’t merely a recommendation: it’s a legal requirement that protects your safety, maintains your insurance coverage, and ensures compliance with building codes. The electrical connection phase includes wiring the inverter to your main panel, installing disconnects and safety equipment, and coordinating with your utility for net metering approval.
The time commitment varies based on system size and your experience level. A typical 5-6 kW residential system requires three to five full weekends for the DIY portions, assuming favorable weather and working with a helper for safety. This timeline includes site preparation, mounting hardware installation, panel placement, and inverter positioning. Add several more weeks for permit processing, scheduling your electrician, and arranging utility inspections before your system goes live.
The complexity level sits somewhere between a deck-building project and basic home renovation work. You’ll need to follow detailed instructions, make precise measurements, work safely at heights, and understand basic electrical concepts even though you won’t perform the actual electrical connections. Most homeowners with moderate DIY experience can successfully complete the mechanical installation with proper planning and patience.
Essential Tools and Materials for Your Solar Installation
Before you purchase a single item, understand that a typical residential solar installation requires equipment across four main categories, with costs varying significantly based on system size and quality choices. For a standard 5kW system in Canada, expect to budget roughly $10,000-$15,000 for all materials if you’re handling the installation yourself.
Solar Panels and Mounting Hardware
The panels themselves represent your largest single expense, typically $200-$400 per panel depending on wattage and efficiency ratings. For a 5kW system, you’ll need 13-17 panels at 300-400 watts each. Don’t skimp on mounting hardware: residential installations require corrosion-resistant aluminum rails, roof attachments (flashing and lag bolts for composition roofs, or specialized clamps for metal roofing), and stainless steel hardware that can withstand decades of Canadian weather cycles. Ground-mount systems need galvanized steel posts, concrete footings, and additional structural bracing. Budget $1,500-$3,000 for complete mounting hardware.
Electrical Components
Your inverter converts DC power from panels to usable AC power, costing $1,000-$2,500 for string inverters or $150-$300 per panel for microinverters. For off-grid systems, add a charge controller ($300-$800) and battery bank ($5,000-$15,000 depending on capacity). You’ll also need properly rated electrical wire (10 AWG or 8 AWG depending on run length), MC4 connectors for panel connections, combiner boxes, disconnect switches, and conduit for weather protection. Electrical components typically run $2,000-$4,000 for grid-tied systems, substantially more for battery backup.
Complete Equipment Checklist
- Personal protective equipment: hard hat, safety harness with roof anchor points, electrical insulated gloves rated for DC voltage, safety glasses, and work boots
- Installation tools: cordless drill with various bits, torque wrench for precise hardware tightening, wire strippers and crimpers rated for solar cables, multimeter for electrical testing
- Roof work equipment: extension ladder rated for your weight plus 50 pounds, roof jacks for steep pitches, chalk line for layout marking
- Sealants and weatherproofing: roof sealant compatible with your roofing material, UV-resistant cable ties, weatherproof electrical boxes
- Measuring and planning tools: tape measure, angle finder for determining roof pitch, stud finder for locating roof rafters
Quality matters significantly with solar equipment that will face harsh Canadian winters. Panels should carry at least a 25-year performance warranty, and all electrical components must be CSA-certified for Canadian installations. While it’s tempting to source the cheapest options online, purchasing from established Canadian distributors ensures warranty support and code-compliant equipment. Many suppliers offer package deals that include all necessary hardware, potentially saving 10-15% compared to piecing together individual components.
Critical Safety Warnings and Precautions
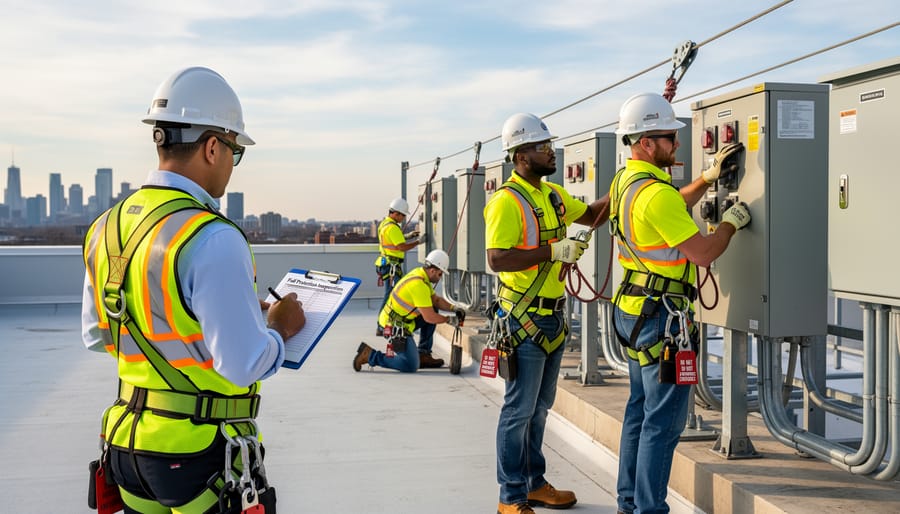
Before you climb onto your roof with solar panels, understand that DIY solar installation involves serious risks that send dozens of Canadians to hospital each year. Electrical shock from mishandled DC circuits can be fatal, and falls from heights remain the leading cause of residential construction injuries.
Working with solar panels means handling high-voltage DC electricity, which behaves differently than household AC current and can continue flowing even after you disconnect a circuit. A 300-watt panel in full sun produces enough amperage to cause cardiac arrest. Never work on electrical connections without proper lockout procedures, insulated tools rated for DC voltage, and a clear understanding of series versus parallel wiring configurations.
Roof work demands fall protection equipment beyond a simple ladder. Canadian occupational safety standards require proper harness systems, secure anchor points, and guardrails for any work above three metres. Snow and ice make Canadian roofs particularly treacherous during installation season, and asphalt shingles become slippery when wet.
Structural concerns matter more than many DIYers realize. Solar arrays add 2.3 to 4 kilograms per square metre to your roof, and mounting hardware creates penetration points where water can enter. You must verify that your roof structure can handle additional dead load plus snow accumulation, which varies from 1.5 kN/m² in Vancouver to over 3 kN/m² in parts of Quebec and Ontario. Incorrect mounting can void your roof warranty and create insurance nightmares if leaks develop.
Canadian electrical code compliance is not optional. The CEC requires specific disconnect switches, proper grounding, and arc-fault protection for all solar installations. Provincial regulations layer additional requirements: BC mandates seismic restraints in certain zones, while Quebec enforces specific French-language labeling. Building permits typically cost $200 to $800 and require stamped engineering drawings for systems over 10 kW.
Know when to stop. If you lack electrical training, have never worked at heights, or feel uncertain about any installation step, the cost of professional help is insignificant compared to injury, fire risk, or equipment damage. Off-grid solar systems offer slightly more DIY flexibility since they do not connect to utility infrastructure, but they still require proper electrical knowledge and safe installation practices.
Step-by-Step Installation Process
Step 1: Site Assessment and System Design
Start by pulling your last 12 months of electricity bills to calculate your average daily consumption in kilowatt-hours. This baseline determines how many panels you’ll need and affects your solar investment returns over time.
Next, evaluate your installation location. For rooftops, you need unshaded south-facing space (southeast or southwest works too) with a slope between 30-45 degrees, ideal for Canadian latitudes. Walk the roof to check for structural issues, noting any soft spots or aging shingles that need repair first. Use a sun path calculator app during site visits to identify shading from trees or neighbouring buildings throughout the day.
Calculate snow load capacity using your provincial building code. Most Canadian residential roofs handle 1.9-2.4 kPa, but solar panels add 15-20 kg per square metre. If you’re considering ground mounting instead, ensure you have level, well-drained space at least 3 metres from property lines.
Map your system design on paper: panel count, string configuration (typically 8-12 panels per string for residential inverters), and wire routing from array to inverter location. Account for 25% efficiency losses from Canadian winter conditions when sizing your system.
Step 2: Obtain Permits and Approvals
Before ordering equipment or climbing your roof, contact your municipal building department to determine required permits. Most Canadian jurisdictions mandate building permits for roof-mounted solar arrays and electrical permits for any system connecting to your home’s electrical panel. Application requirements vary by province and municipality, some accept detailed DIY plans, while others require drawings stamped by a professional engineer.
Submit your permit applications alongside system specifications, site plans showing panel placement, and electrical diagrams. Processing times typically range from two to six weeks, though rural areas may move faster than urban centres. Simultaneously, contact your electrical utility to initiate an interconnection agreement application if you’re planning a grid-tied system. This separate process authorizes your system to export power and may require additional technical documentation.
Budget three to eight weeks total for complete approval, and don’t proceed with installation until permits are issued, unauthorized work can result in removal orders and insurance complications.
Step 3: Install Mounting Hardware
Before drilling a single hole, double-check your measurements against the system design. Roof-mount installations require precise stringer placement aligned with rafter locations, use a stud finder or consult building plans to avoid penetrating between structural supports, which compromises load capacity.
For roof penetrations, flashing kits are non-negotiable in Canadian climates. Each lag bolt must pass through a waterproof flashing boot before entering the roof deck. Apply roofing sealant generously around the flashing base, then secure it under the shingle above and over the shingle below to direct water flow away from the penetration. Torque bolts to manufacturer specifications, overtightening can crack flashing and create leak paths.
Install mounting rails with slight gaps between sections to allow thermal expansion. Verify that rail spacing matches your panel dimensions exactly; even 5 cm misalignment creates mounting headaches later.
For ground-mount systems, concrete footings must extend below frost line depth for your region (typically 1.2-1.8 metres across Canada). Allow concrete to cure fully, seven days minimum, before attaching framework.
After mounting hardware installation, physically test each connection point by applying firm upward and lateral pressure. Any movement indicates inadequate fastening that won’t survive winter wind gusts or snow accumulation.
Step 4: Mount Solar Panels
Lifting panels onto your roof requires at least two people, solar panels are awkward, typically measuring 65×40 inches and weighing 40-50 pounds each. Work on calm days to avoid wind catching the panels. Use a pulley system or ladder hoist for rooftop installations rather than carrying panels up manually.
Start at the bottom row of your mounting rails and work upward. Slide each panel into the rail channels, ensuring the frame sits flush against the mounting clamps. Most systems use mid-clamps between adjacent panels and end-clamps at the array perimeter. Tighten clamps to manufacturer specifications, typically 10-15 ft-lbs of torque, to prevent thermal expansion issues without crushing the panel frames.
For Canadian installations, aim for a tilt angle matching your latitude (roughly 45-55 degrees depending on your province) to maximize year-round production and encourage snow shedding. Panels should face true south for optimal performance, though southeast or southwest orientations lose only 5-10% efficiency.
Before moving to the next panel, double-check that mounting clamps are secure and that there’s proper drainage space between the roof surface and panel backs for air circulation.
Step 5: Install Inverter and Electrical Components
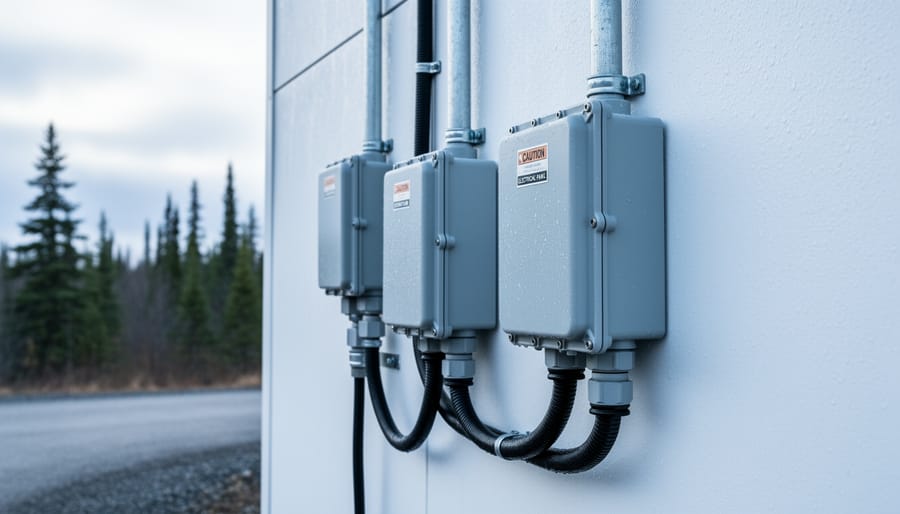
Installing the inverter represents a critical transition point in your DIY solar project. Mount your inverter in a cool, dry location, typically your garage or basement, away from direct sunlight and moisture. Never install it outdoors unless you’ve purchased a specifically rated outdoor model. Check the manufacturer’s specifications for clearance requirements; most inverters need at least 12 inches of space on all sides for ventilation and heat dissipation.
Before mounting, verify the wall structure can support the inverter’s weight. String inverters typically weigh 40-70 pounds and require secure attachment to studs or concrete. Use the mounting bracket provided and ensure it’s perfectly level.
For wiring panel strings together, you’ll connect panels in series using MC4 connectors, following your system design plan. Double-check polarity, positive to positive, negative to negative between panels, then positive from one string to negative of the next for parallel connections at the combiner box.
Here’s where your work stops: do not connect the inverter to your main electrical panel. This final grid connection requires a licensed electrician who will handle the AC wiring, install the required disconnect switches, and ensure code compliance. Attempting this yourself risks electrocution, fire, permit rejection, and voiding your equipment warranties.
Step 6: Professional Electrical Connection and Inspection
At this stage, your hands-off work begins. A licensed electrician will connect your inverter to the main electrical panel, ensuring all wiring meets Canadian Electrical Code standards. They’ll install a dedicated breaker, configure the disconnect switch, and verify proper grounding. For grid-tied systems, expect them to install a bidirectional meter or prepare your existing meter for replacement by the utility.
The electrician will coordinate the required electrical inspection, which typically occurs before utility connection. The inspector verifies code compliance, proper labeling, and safety features. Once approved, your utility schedules final meter installation and activates net metering if applicable. This process takes one to six weeks depending on your province and utility backlog. Keep all documentation, including inspection certificates and interconnection agreements, for warranty purposes and future reference.
Step 7: System Commissioning and Monitoring Setup
Once your licensed electrician completes the grid connection and the inspector approves your system, you’re ready to commission and verify everything works correctly. Start by checking the inverter display, it should show green status lights and begin reporting power production within minutes of activation. Most modern inverters include built-in Wi-Fi or cellular connectivity; follow the manufacturer’s app setup instructions to register your system and establish remote monitoring.
The commissioning sequence follows these essential steps:
- Verify the inverter powers on and displays normal operating status without error codes
- Download and configure the manufacturer’s monitoring app using your system serial number
- Confirm real-time power production appears in the app during daylight hours
- Check that your utility meter runs backward when the system produces excess power (for grid-tied systems)
- Record baseline performance data on a clear day to establish your expected output range
Document your system’s peak production on the first sunny day, this becomes your performance benchmark. Canadian systems typically produce 10-30% less in winter due to shorter days and snow cover, so establish separate summer and winter baselines. Set up alert notifications in your monitoring app to catch performance drops that might indicate panel soiling, shading issues, or technical problems. Most apps track daily, monthly, and lifetime energy production, plus current power output and historical trends that help you understand your system’s patterns and verify it’s meeting design expectations.
Testing, Verification, and What to Monitor

Once your system goes live, verifying proper operation involves more than watching your utility meter spin backwards. Start by checking voltage output at the inverter display, it should match grid voltage, typically 120/240V in Canada. Monitor current flow during peak sunlight hours (usually 10am-2pm) to confirm panels are producing near their rated capacity. Most modern inverters display real-time power generation in kilowatts; on a clear day, a 5kW system should produce close to 5kW at solar noon.
Essential verification steps and performance metrics to track include:
- Daily energy production in kilowatt-hours, comparing actual output to system estimates
- Inverter error codes or fault messages, which indicate wiring issues or component failures
- Panel surface temperature, excessive heat suggests poor ventilation or mounting problems
- Voltage consistency across panel strings to identify underperforming modules
- Grid connection status, ensuring your net metering arrangement is recording properly
- Monthly production trends to establish seasonal baselines for your location
Canadian winter conditions demand specific attention. Snow accumulation can block panels entirely; if production drops to zero after snowfall, you’ll need to clear them safely or wait for melt-off. Production naturally decreases in winter due to shorter days and lower sun angles, but cold temperatures actually improve panel efficiency, expect 10-15% better performance per watt in January compared to July, despite fewer daylight hours.
Common troubleshooting starts with the obvious: dirty panels reduce output by 5-20%, so rinse them quarterly. If one panel underperforms, check for shade creep from growing trees or new construction. Inverter failures typically announce themselves with error codes; consult your manual before calling support. Watch for loose connections at junction boxes, especially after thermal cycling through Canadian seasons. Most monitoring apps alert you to problems, but manual monthly reviews catch gradual declines that automated systems miss.
Common Questions About DIY Solar Installation
Will installing solar panels myself void the manufacturer’s warranty?
Most panel warranties remain valid as long as you follow proper installation procedures, but inverter warranties often require professional installation. Always check warranty terms before starting, and keep detailed documentation of your work including photos and electrical test results.
Do I need to notify my home insurance company about a DIY solar installation?
Yes, you should inform your insurer before beginning the project. Most policies require notification of significant home improvements, and solar installations increase your home’s value. Some insurers may require proof of permits and final electrical inspection before coverage extends to the system.
How does a DIY solar system affect my home’s resale value?
Professionally inspected solar systems typically increase home value by 3-4%, but DIY installations may face scrutiny from buyers and appraisers. Maintaining complete documentation, permits, inspection certificates, electrical work by licensed professionals, helps preserve resale value and buyer confidence.
Can I add battery storage to my system later?
Yes, most modern inverters allow for future battery integration, though retrofitting batteries costs more than including them initially. Choose a hybrid or battery-ready inverter during installation if you’re considering storage down the line, as this simplifies the upgrade process.
Canadian homeowners benefit from several federal and provincial incentives for residential solar in 2026. The Canada Greener Homes Grant program continues to provide rebates up to $5,000 for solar installations that meet efficiency standards, while provinces like Ontario, British Columbia, and Alberta offer additional credits or low-interest financing programs. These incentives apply to DIY projects provided you obtain proper permits and pass final inspections. The growth of renewable tech in 2026 has also expanded equipment options, with more Canadian suppliers offering competitively-priced components designed for our climate. Off-grid systems with battery storage qualify for separate incentive streams in some provinces, particularly in remote areas where grid connection isn’t feasible. Check with Natural Resources Canada and your provincial energy ministry for current program details, as funding levels and eligibility requirements change regularly.
Taking on a solar DIY installation is more than a home improvement project. It’s your direct contribution to Canada’s renewable energy future. By following proper procedures, respecting safety requirements, and knowing when to call in licensed professionals for critical electrical work, you can successfully install a system that reduces your carbon footprint while cutting energy costs for decades.
The DIY solar power initiatives community continues to grow across Canada, with homeowners sharing knowledge, troubleshooting together, and demonstrating that clean energy adoption doesn’t always require prohibitive upfront costs. Your installation becomes part of this larger movement toward energy independence and environmental responsibility.
Remember that completing what you can safely and legally accomplish yourself, then engaging certified electricians for grid connections and final inspections, represents smart project management. This hybrid approach maximizes your cost savings while ensuring code compliance and system safety. Your insurance provider and future home buyers will appreciate documentation showing professional involvement at critical stages.
As you commission your system and watch those first kilowatt-hours flow from sunlight, you’ll understand why so many Canadians find this work deeply satisfying. You’ve transformed your roof into a power plant. Start monitoring your production, join online forums to share your experience, and consider how battery storage or system expansion might fit your future plans. The clean energy transition needs people willing to learn, build, and lead by example.